¶ Admin User Guide
The admin page serves as a way to manage: ports, customers, and rates within the CMS system.
Upon clicking the Admin sidebar button the page will appear like the picture below.

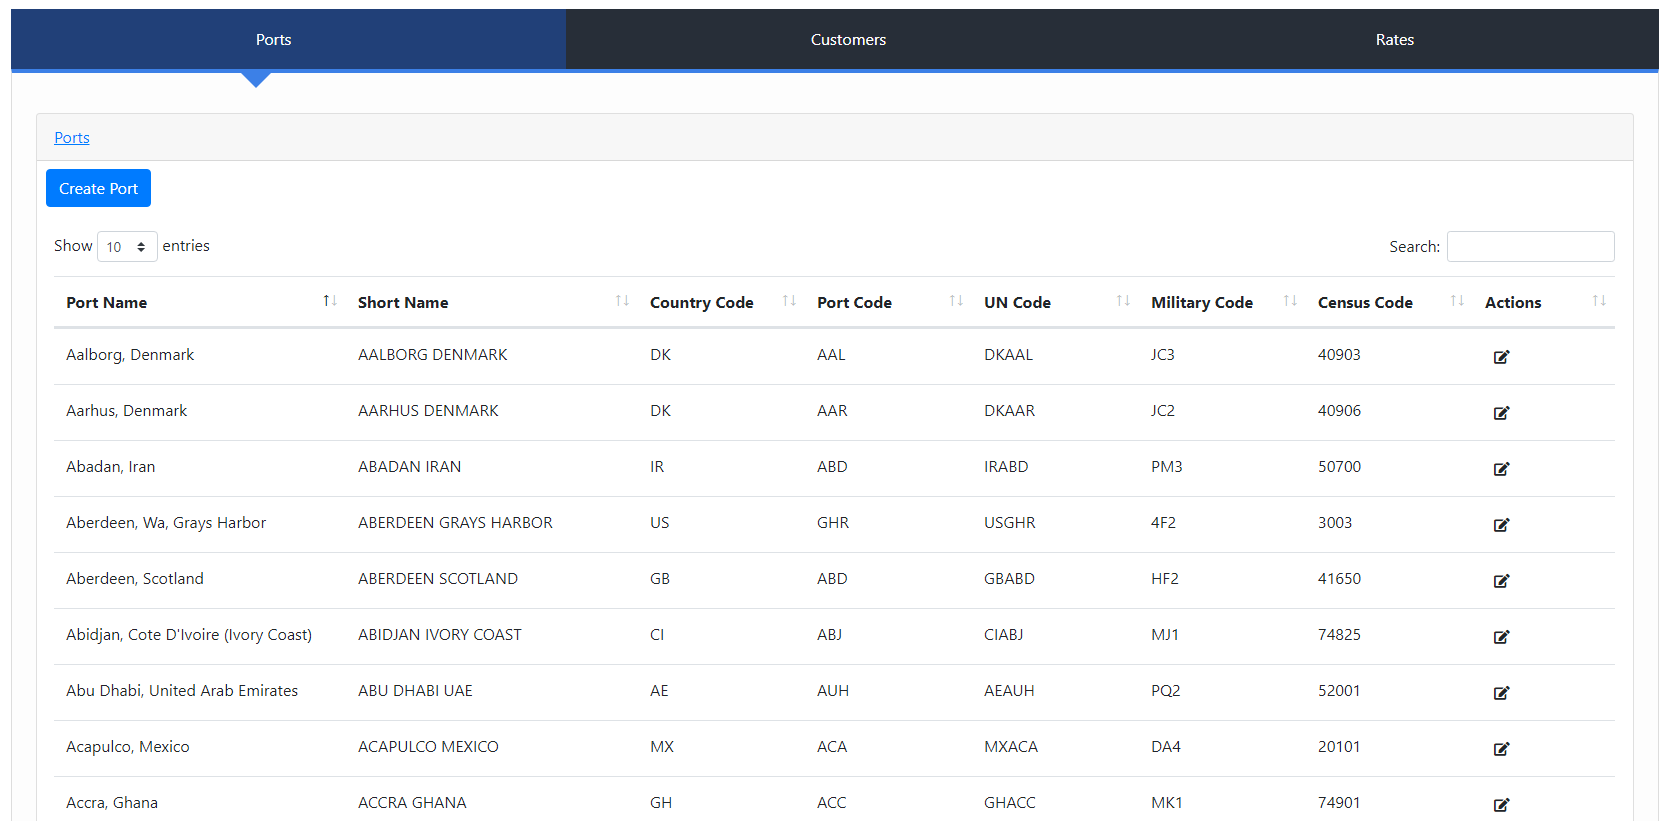
After clicking on the “Ports” card header the table will appear with all of the data regarding Ports in the system.
¶ Functionality
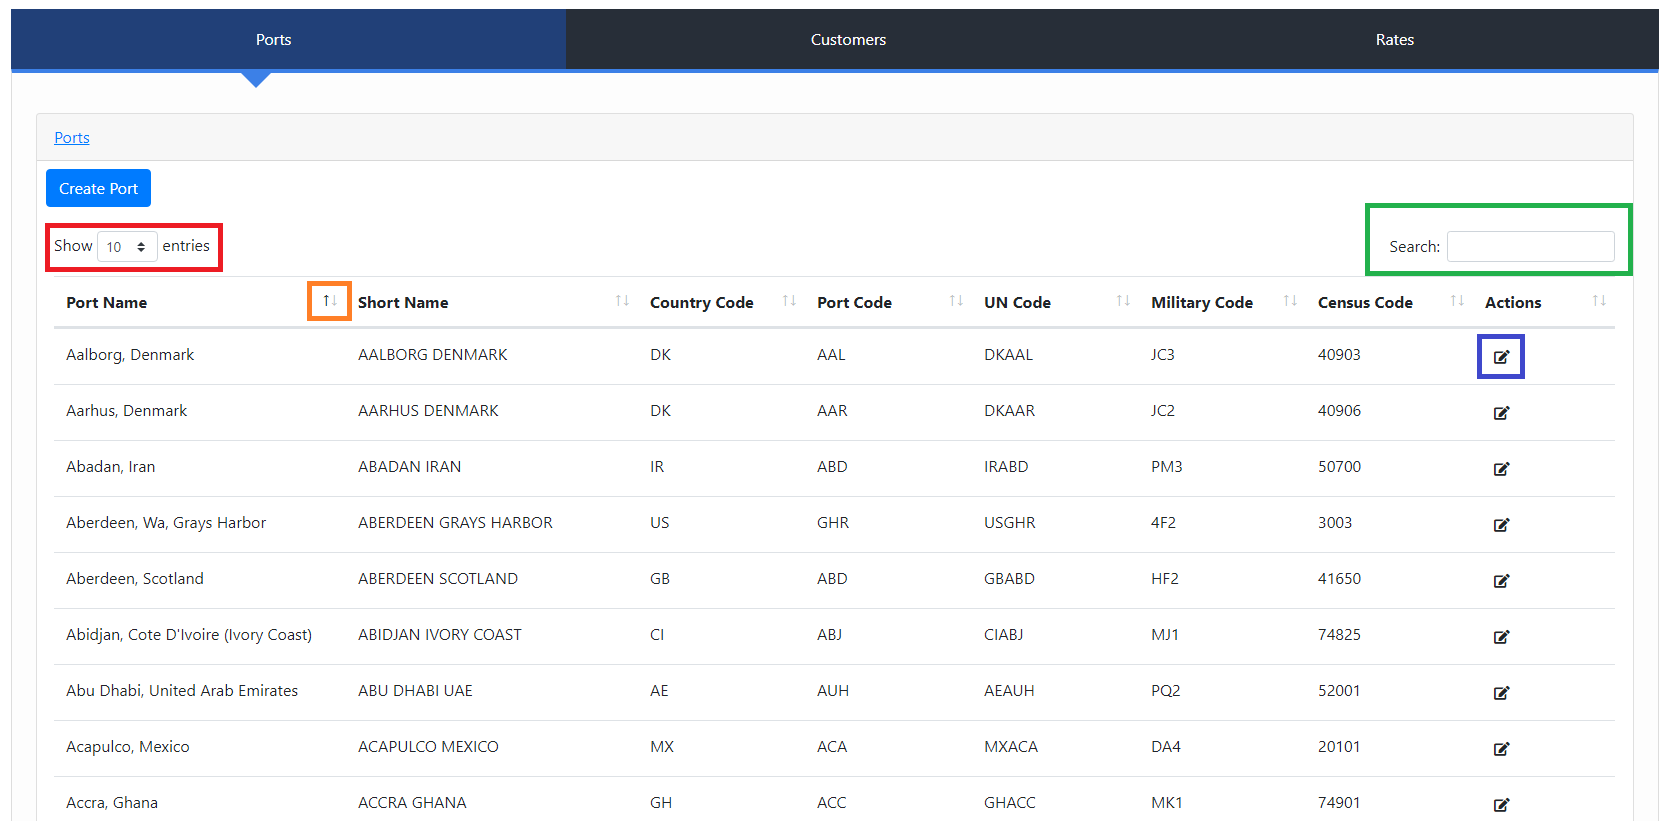
Highlighted above are different functionalities that apply to not only the ports table, but also the customers tables as well.
In RED, is a filter that allows you to change how many rows you would like displayed on the page. Click on the box with the default value “10” and change the value to your preference.
In ORANGE, is a button that allows you to sort the table by that column either ascending or descending order. By default the tables are sorted by the “Name” column in ascending order. Any column is able to be sorted in ascending or descending order by clicking this button on the appropriate column.
In GREEN, is a search bar which will allow you to search the table by any column value. For example, (Port Name, Short Name, Country Code, IMO Number, etc.) as long as the value you are searching by is present in the appropriate table.
In BLUE, is the edit button. Clicking this button will allow you to edit the values associated with this row.
¶ Ports
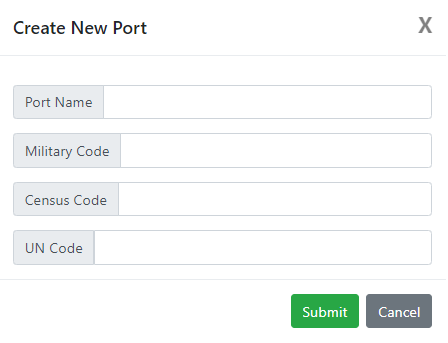
After clicking the blue “Create New Port” button at the top left of the screen this popup will appear and you must fill out the text fields with the data you would like to add and click the “Submit” button. If you click this by accident, or change your mind about adding a port, simply click the “X” on the top right or the “Cancel” button on the bottom right.
Port Name: Ports Names should be entered as follows: Port Name, Country (ex. Aioi, Japan)
Military Code: Most military codes can be found on the following document, Military Port Codes.
(Backup link: Military Codes). - Press “Open” to view the document or “Download” to save a copy to your computer
Census Codes: Most census codes can be found here, Census Codes
UN Code: All UN codes can be found here, UN Codes
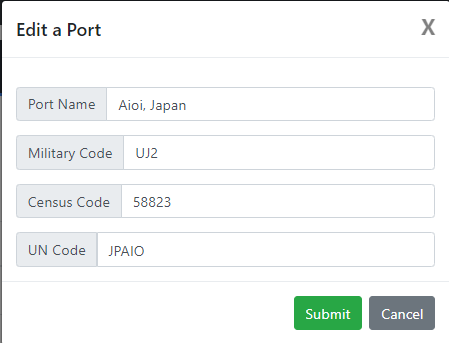
Similarly, if you click the “Edit” button, located in the picture above in the blue box, under the actions column. This popup will appear with the text fields prefilled with the data from the row you selected. Make any desired changes and click the “Submit” button. Fields on this form should follow the same conventions as above. If you click this by accident, or change your mind about editing a port, simply click the “X” on the top right or the “Cancel” button on the bottom right.
¶ Regions
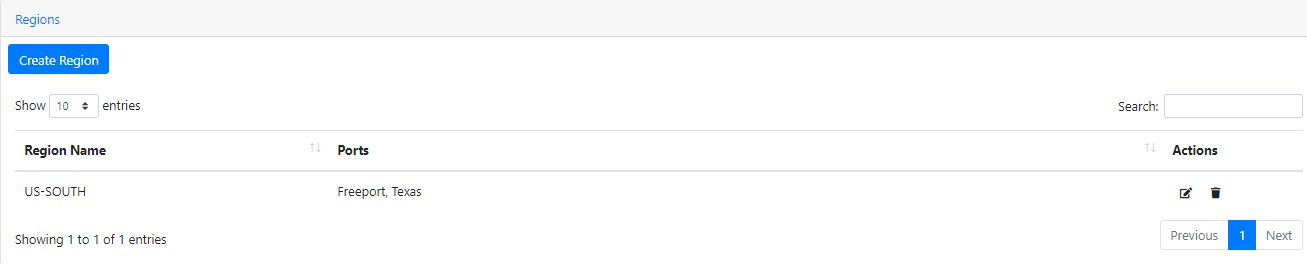
The newly added “Regions” tab allows users to define a region as a collection of ports. To create a region, click the “Create Region” button on the top-left. To edit or delete a region, click the appropriate buttons in the Actions column
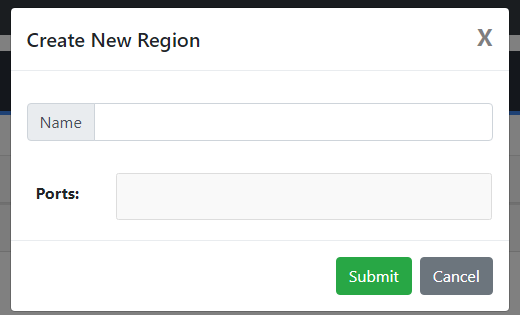
Simply enter in the name of the region you would like to create and use the Ports Selector to choose which ports you would like to be included in this region. Then press the “Submit” button and then the new region will be created and be available for use throughout the CMS.
¶ Customers
In order to get to the customers tab you must simply click the “Customers” button at the top of the page.

Once the “Customers” button is selected, all of the customers' data will appear in the table. Similar to the ports tab, here you can also change the amount of entries per page, search for customers, etc.
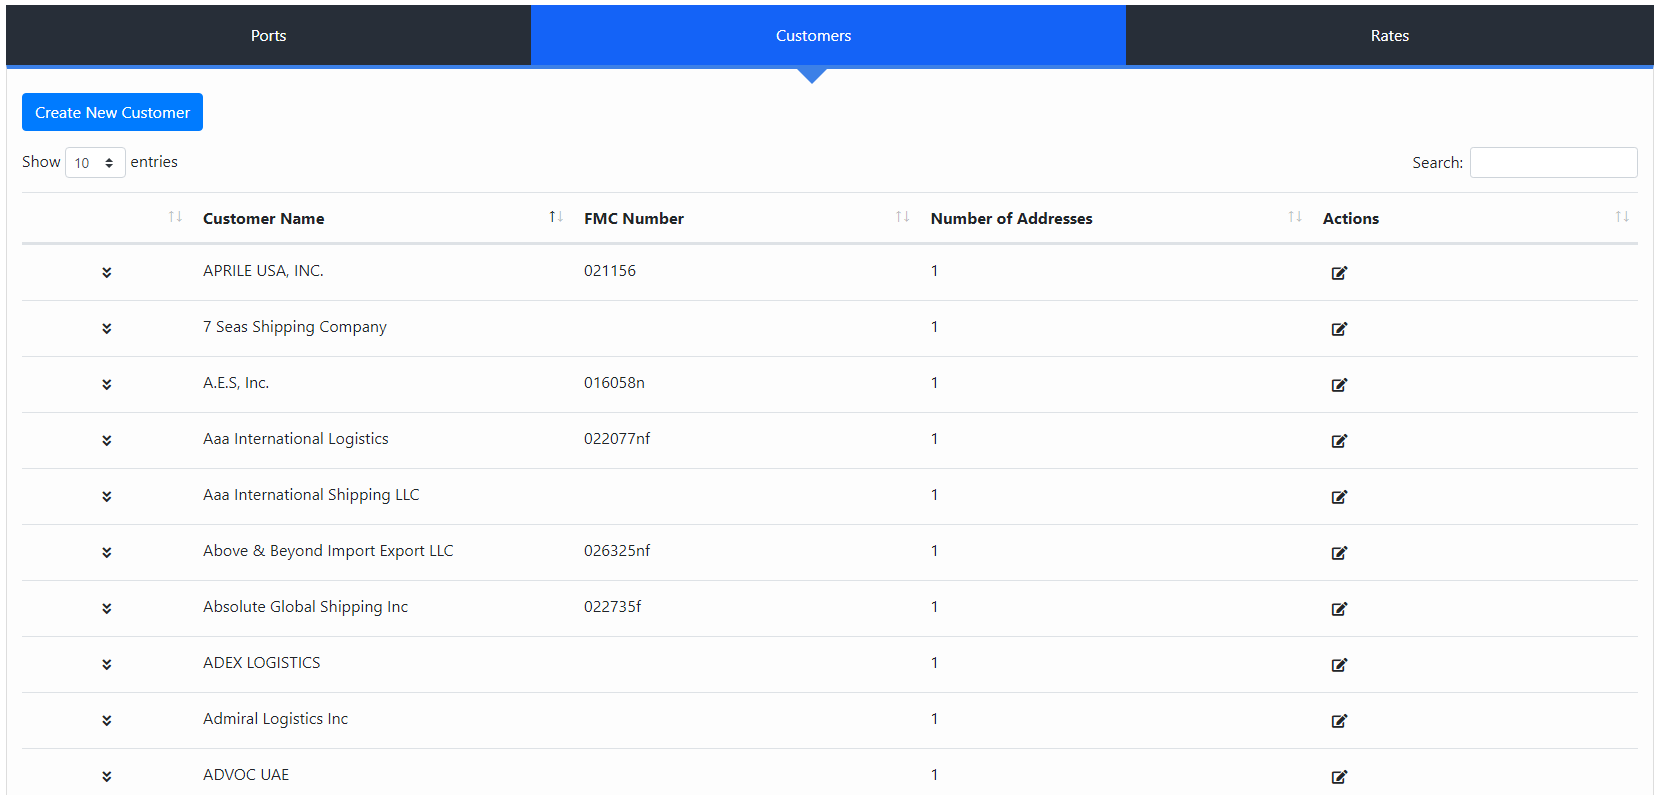
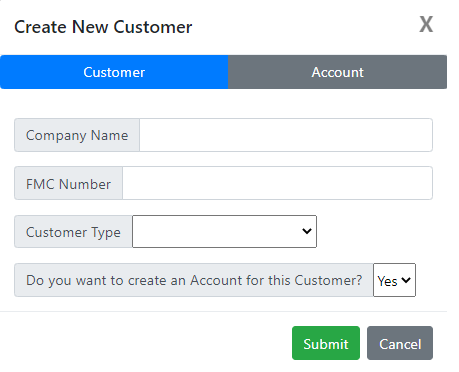
After clicking the blue “Create New Customer” button at the top left of the screen this popup will appear and you must fill out the text fields with the data you would like to add. If you would like to additionally create an account associated with this customer, ensure that “Do you want to create an Account for this Customer?” input is set to “Yes”. If the input is set to “No” upon clicking submit the new customer will be added to the table without an associated account. If the input is set to “Yes” the popup below will display. If you click this button by accident, or change your mind about adding a customer, simply click the “X” on the top right or the “Cancel” button on the bottom right.
Company Name: The name of the customer's company (ex. Caterpillar INC.)
FMC Number: Can be found online: FMC Numbers. Use the download button in the top right to download an excel file containing all FMC numbers.
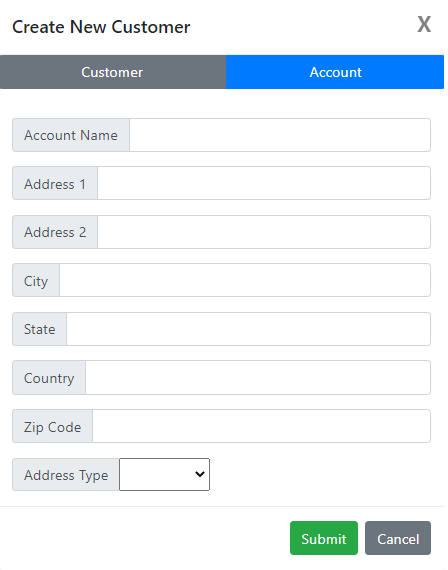
If you selected “Yes” that you would like to create an account for the customer, then upon clicking submit you will be brought to this tab. Fill out the text fields with the data you would like to add and click the “Submit” button. If you click this by accident, or change your mind about adding a customer account, simply click the “X” on the top right or the “Cancel” button on the bottom right. Additionally, the link next to FMC number can provide addresses for all companies that comply with OTI regulations.
Account Name: An internal reference, an identifier used by the system to make finding the account easier. These will never be shared with any outside party and will not appear on any documents.
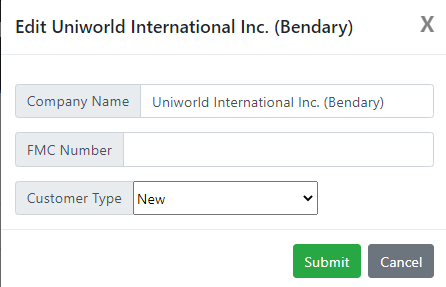
Similarly, if you click the “Edit” button, located in the picture above in the blue box, under the actions column. This popup will appear with the text fields prefilled with the data from the row you selected. Make any desired changes and click the “Submit” button. If you click this by accident, or change your mind about editing a customer, simply click the “X” on the top right or the “Cancel” button on the bottom right.
In order to view the accounts associated with a customer, select the dropdown arrow located in the red box in the picture below. After clicking this button the customer will drop down and another table will be displayed showing the accounts for the associated customer if any exist.

To add a new account associated with the customer click the blue button at the bottom of the table. A popup will appear the same as the one above for adding a customer to an account. Fill out the fields and click the “Submit" button upon completion. If you click this button by accident, click the “X” on the top right or the “Cancel” button on the bottom right.
To edit an account associated with a customer click the edit icon under the actions column in the accounts table under the customer, as seen in the orange box above. A popup will appear with the text fields prefilled with the data from the row you selected. Make any desired changes and click the “Submit” button. If you click this by accident, or change your mind about editing a customer's account, simply click the “X” on the top right or the “Cancel” button on the bottom right.
To delete an account associated with a customer click the “Trash” icon under the actions column in the accounts table under the customer, as seen in the orange box above to the right of the edit icon. Clicking this button will prompt the following popup:
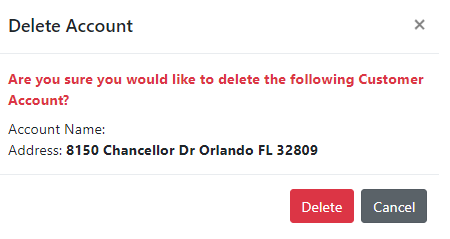
Click the “Delete” button if you're sure this is the account you wish to delete from the associated customer. A spinning loading icon will appear next to the delete button indicating the change is processing. Once finished the account will be removed from the customer and the Customers table will appear. If you click this by accident, or change your mind about deleting a customer's account, simply click the “X” on the top right or the “Cancel” button on the bottom right.
¶ Rates
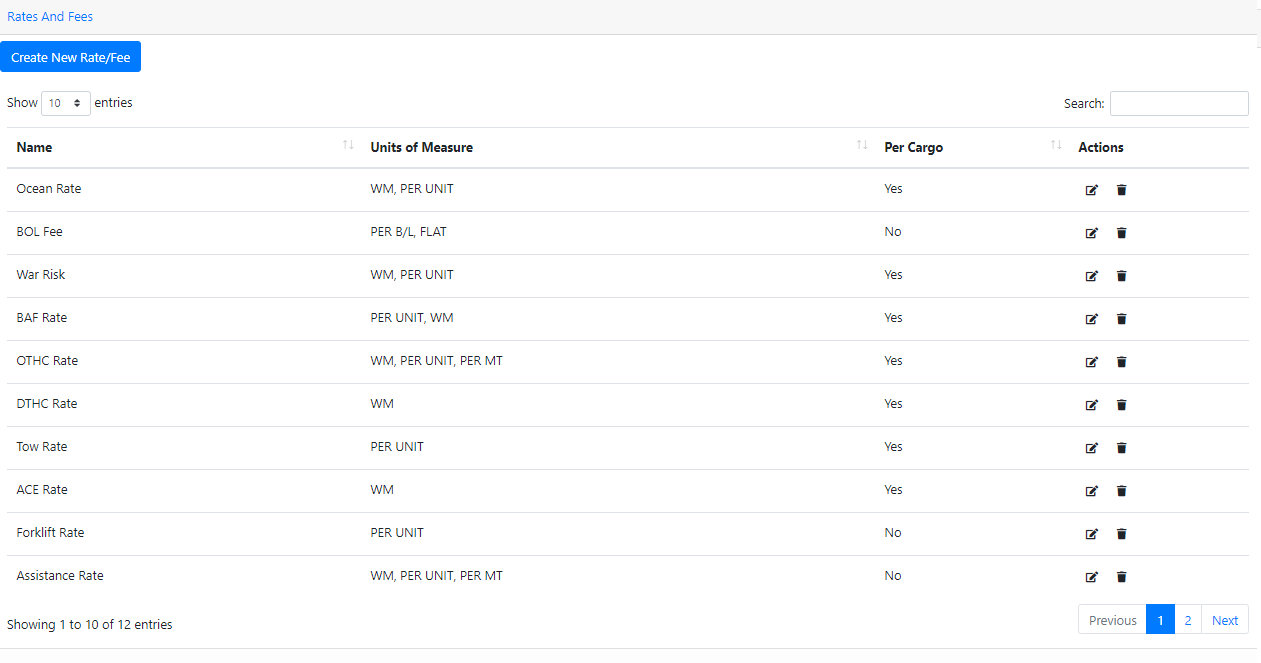
The newly added “Rates” tab allows users to create, edit, and delete different Rate Types or Rates and Fees

“Rate Types” Tab - Currently the Rate Types set up on this tab should not have to be touched, but in the future will serve as a means for setting up buckets of rates in order to set up for example contract rates with a particular customer.
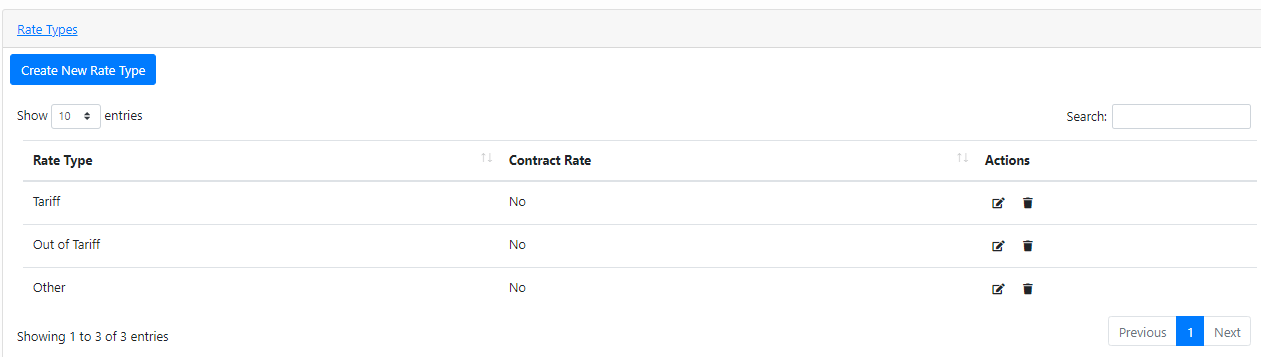
“Rates and Fees” Tab - This tab is for adding in new “rates/fees” into the system. For example if you wanted to add a “Battery Fee” you would come to the “Rates & Fees" tab as seen here and click “Create New Rate/Fee”. Here you can also edit or delete rates and fees from the entire system. Rates that are crucial to the system's operation will not be able to be deleted, ex. Ocean Rate, BAF Rate, etc. but can be renamed.
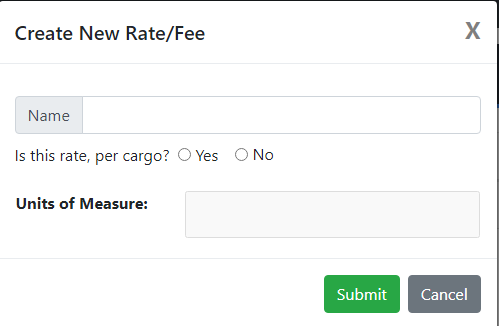
Creating a new Rate or Fee is simple - just enter in the name of the new rate/fee, check off the circle if the rate is per cargo or not, and then use the Units of Measure selector to determine which units should be associated to the rate/fee.
¶ Important Notes
Be cautious when using the admin page as the data here is used throughout the entirety of the CMS.
If you have any questions or issues to report regarding the admin page, please submit a help desk ticket with “Admin Page Help/Bug” in the subject line.