¶ Cargo Tracker User Guide
The Cargo Tracker module serves as a way to view information about the cargo entered into the inventory module. By entering in an appropriate vessel and voyage number, you can view all of the details regarding the cargo that is either booked, on ground, or loaded corresponding to that vessel.
¶ Cargo Load Summary
Upon accessing the Cargo Tracker module from the sidebar of the CMS you will see the following:
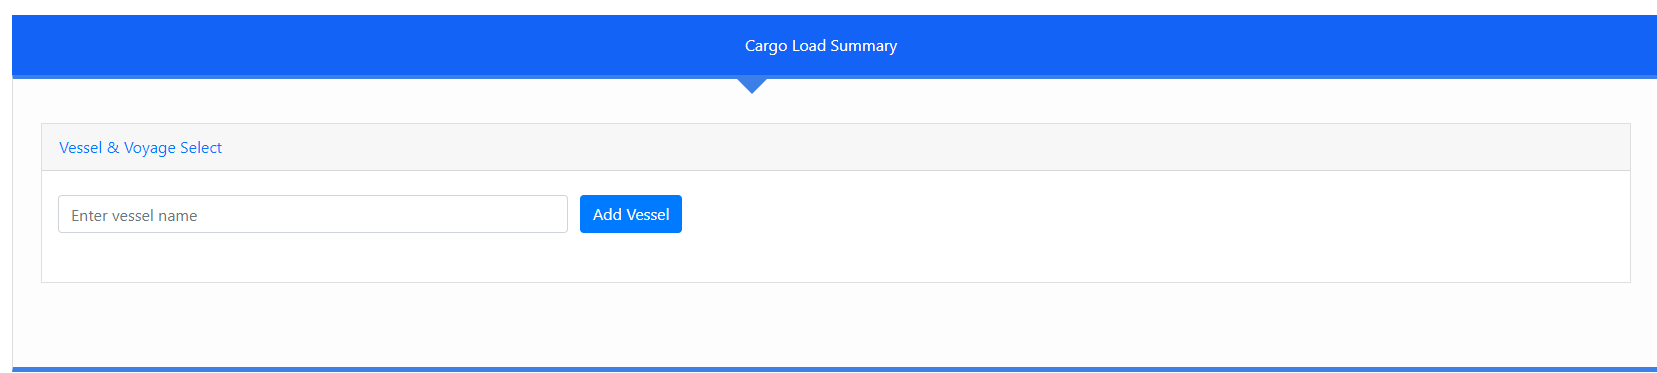
First, enter in the name of the vessel for the cargo you want to track into the input field. The field will attempt to autocomplete your search by displaying a list of dropdowns below. Keep in mind that the name of the vessel must match exactly as to what's in the system, capitalization is ignored however.
After entering in a valid vessel name and clicking the blue “Add Vessel” button, the following modal window will appear. Here is where you will select which voyages you would like to see the cargo for.
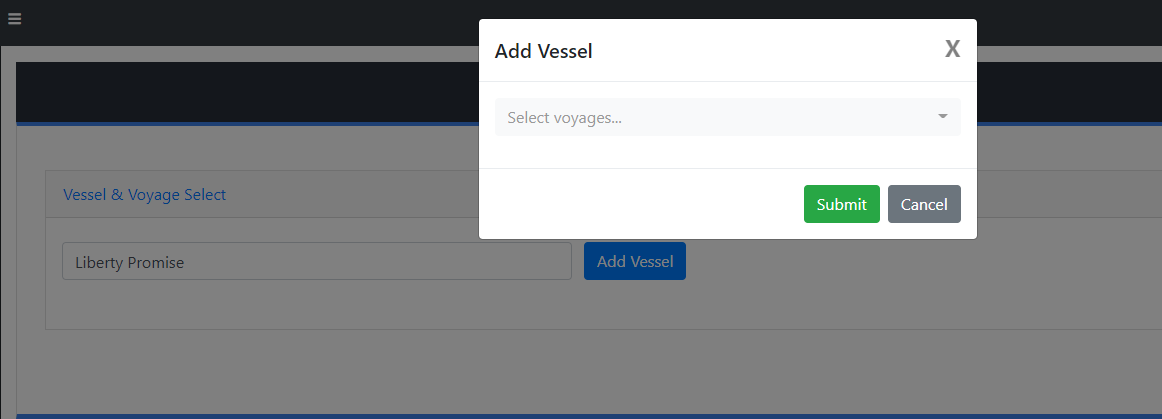
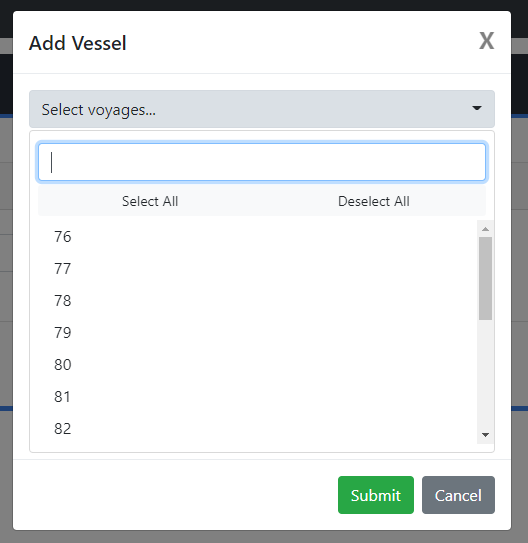
Click the dropdown, “Select voyages…” and you will see a list of all the available voyages for that vessel in the system. From here, you can either scroll down the list to find the voyage you would like, or begin typing into the input field to narrow down the voyages that are in the list.
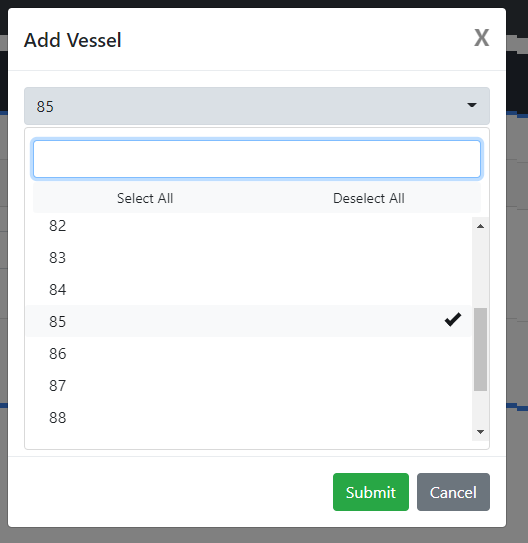
After finding the voyage you would like to view, select it by clicking on it in the list of voyages.
NOTE: Multiple voyages can be selected at once!
Once you have selected all the voyages you would like to view, click the green “Submit” button at the bottom of the modal to retrieve the data associated with these voyages.
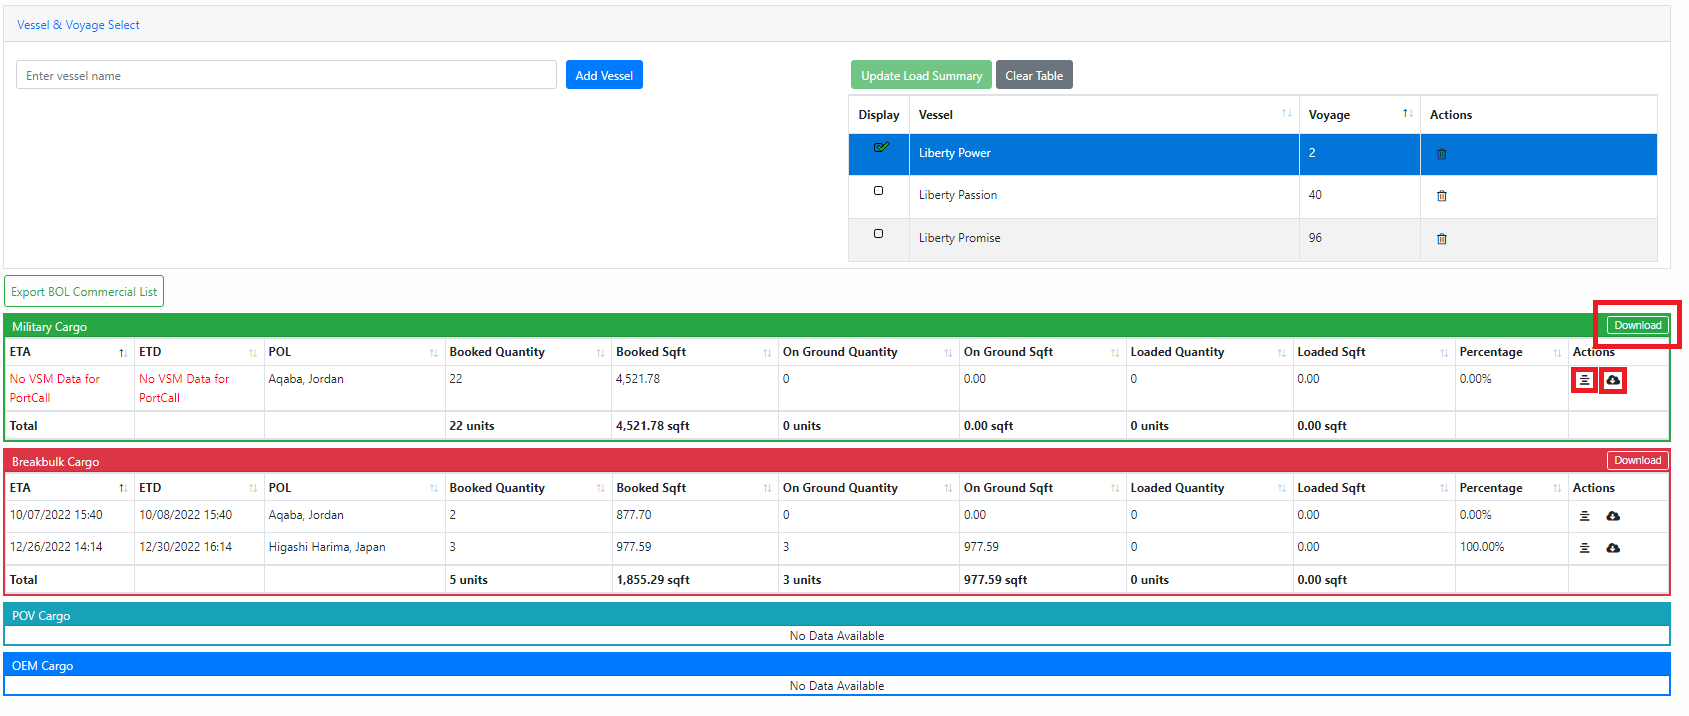
After submitting the voyages you will see a table appear on the right side as seen in the picture. This table will be used to store all of the vessels and voyage combinations that you are currently viewing. This will allow you to quickly switch between viewing different cargo data. As seen below, after submitting a voyage it will appear selected in the table and then the load summary data will appear below. If you input multiple voyages at once, the last voyage in the list you entered will appear selected and it's data will populate the tables below.
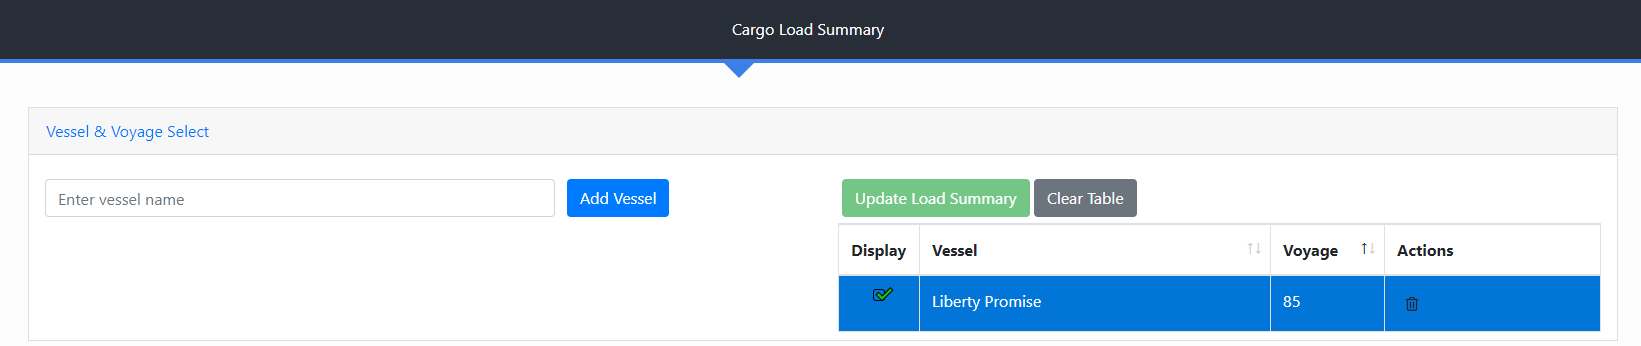
To insert another vessel or voyage repeat the same process as described above.
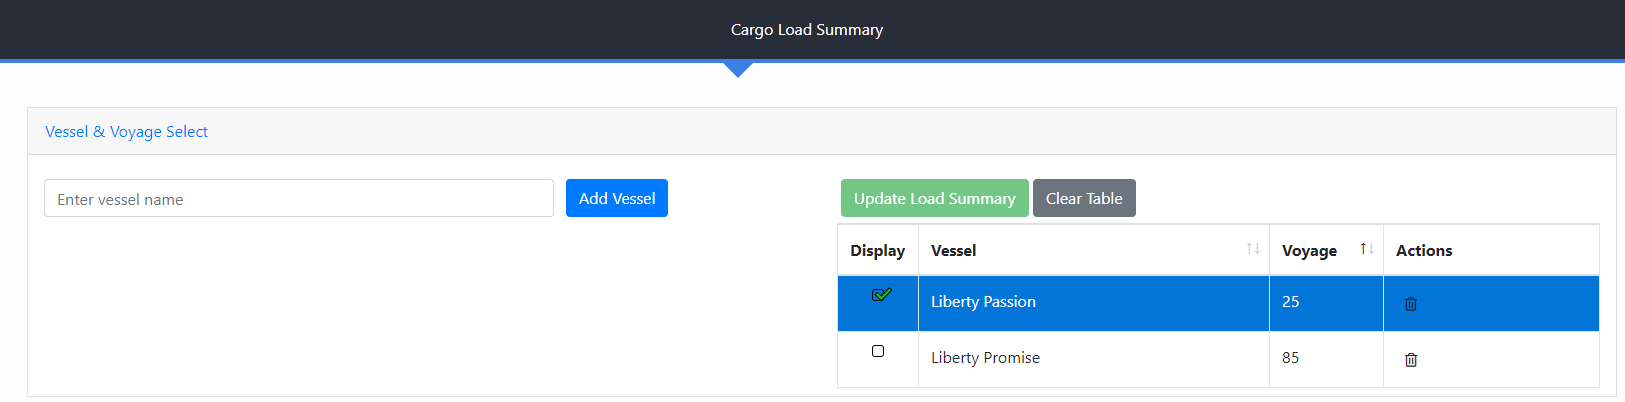
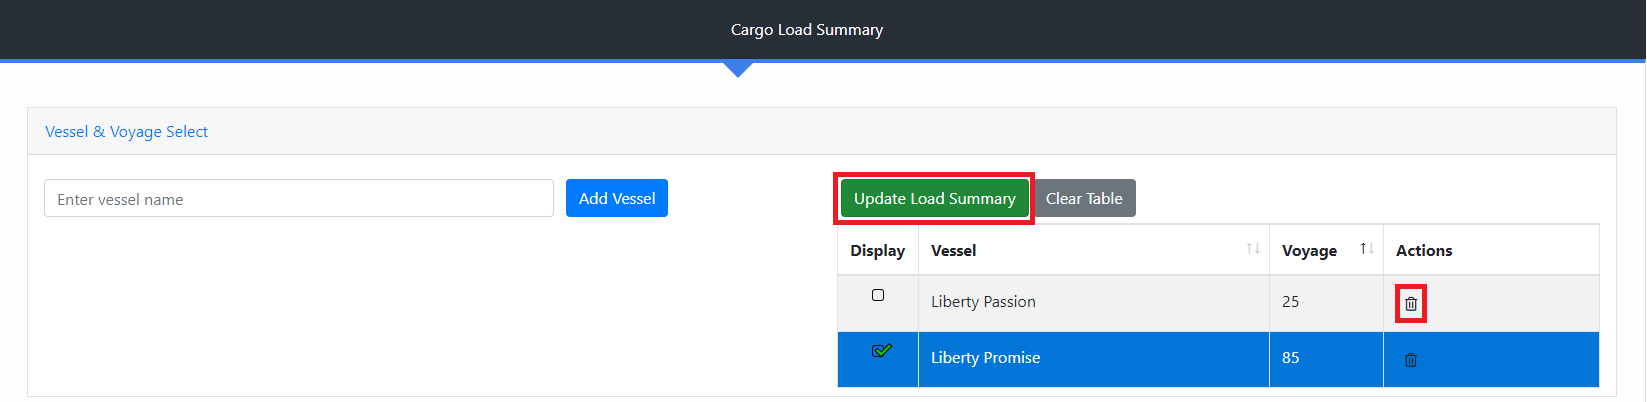
When working with multiple vessel/voyage combinations you can update the cargo data in the table below by clicking on the check box in the display column of the table, and then clicking the green “Update Load Summary” button. This will refresh the data tables on the page with the appropriate information. Another option that is available is to remove a vessel/voyage combination from the table by clicking the trash icon in the actions column of the table.
NOTE: If you delete a vessel/voyage from the table that you are currently viewing the data displayed will disappear.
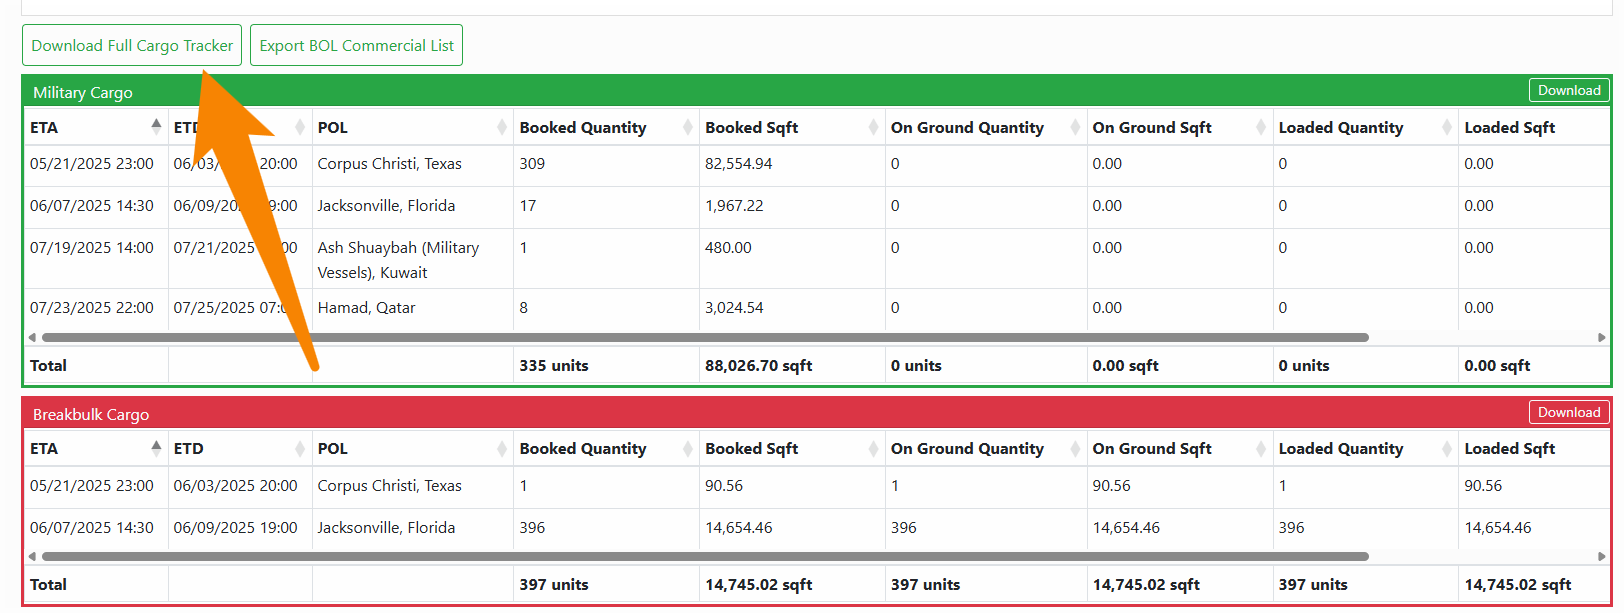
After either submitting a voyage or clicking the “Update Load Summary” button, the tables below will appear with the data from the selected vessel and voyage. Here you will find the cargo load summary data, with a few options to work with. First, there is an option in the top left that will allow you to download the Full Cargo Tracker, both Commercial and Military. Second, you have the white download button located on the right of the headers of each table. Clicking this button will download all of the data in the table in a .csv format for use in Microsoft's Excel. Additionally, in the action's column of each row is a view button that can be clicked to see the details associated with that row of data only and also a download button that can be clicked to download the details associated with that row of data only.
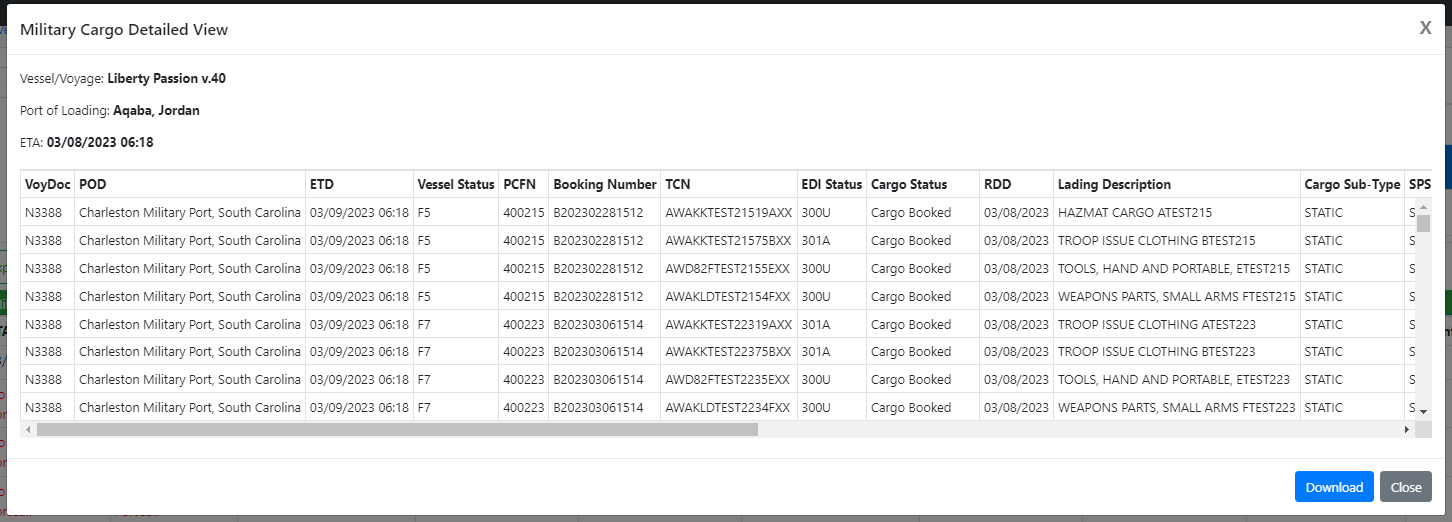
After clicking the view button on a row, a modal will appear with the detailed data for that port of loading, including a download button as well.
If at any point you wish to clear all vessels and voyages from the table, simply click the grey, “Clear Table” button.
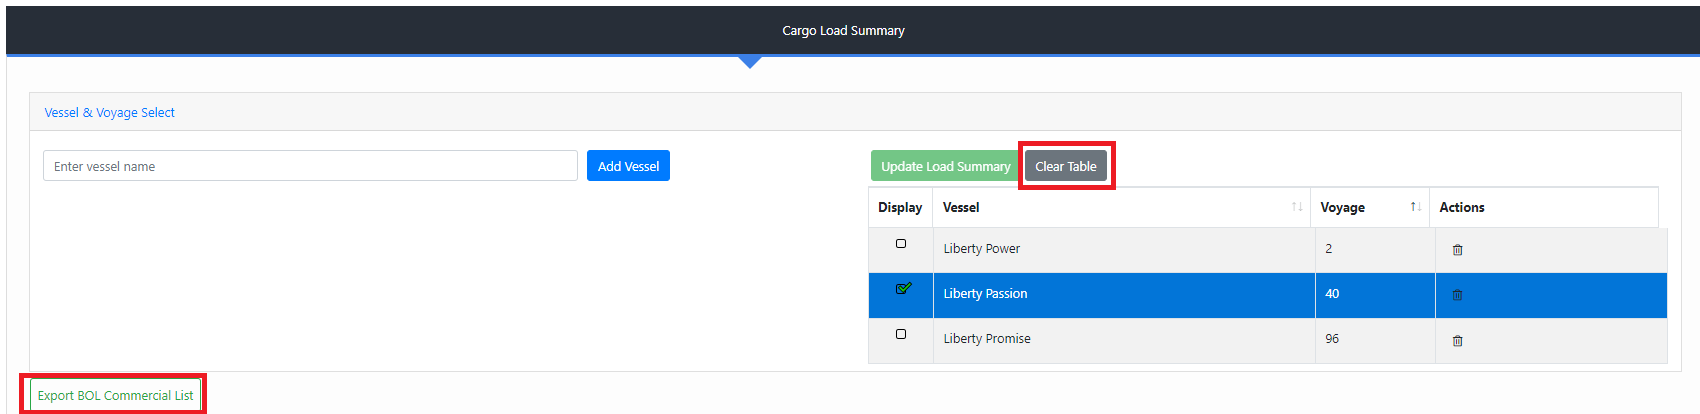
Also, the “Export BOL Commercial List” button when clicked will export a list of all the commercial cargo data that has an associated BOL with its relevant data.
¶ Important Notes
If you would like to submit a bug report or enhancement request for the Cargo Tracker, please use the “Report Issue” button on the toolbar at the top-right of the screen.