¶ Liberty Vessels
¶ Non-Logged In Features
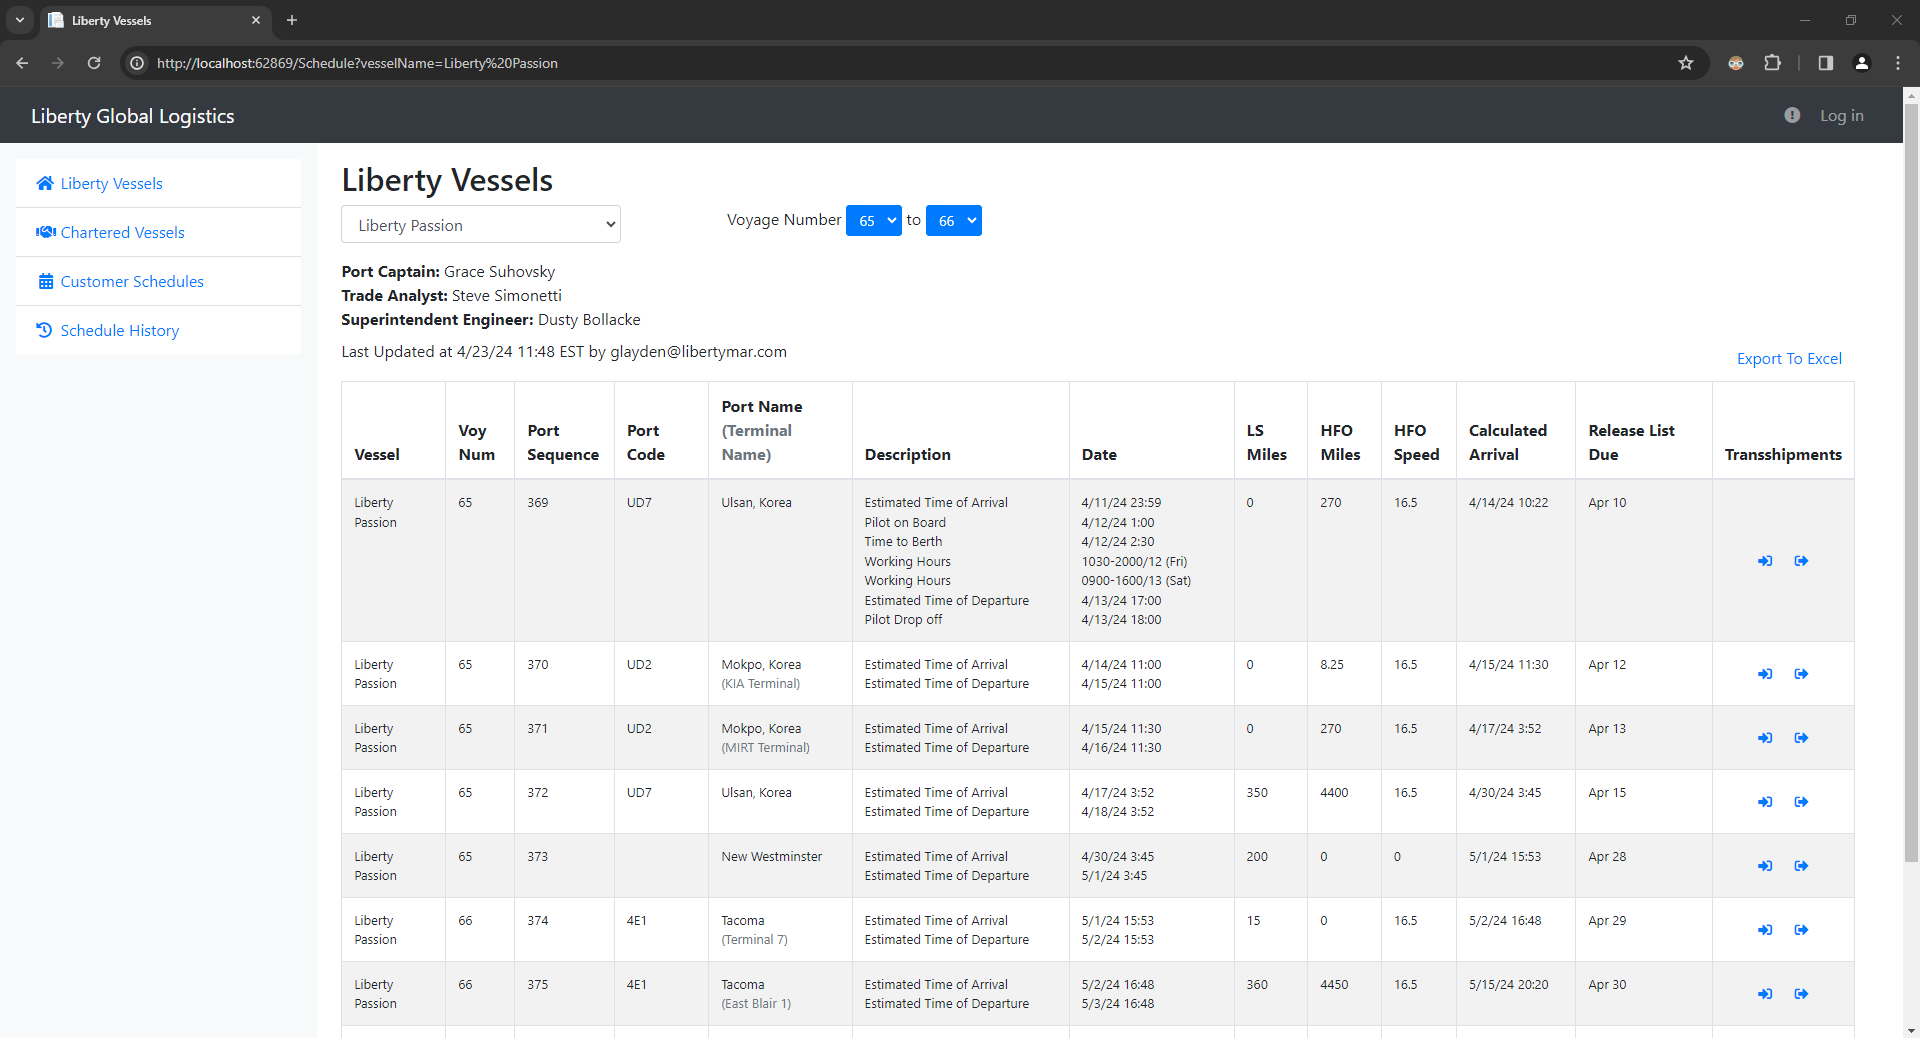
On this page the user will be able to view the current schedule for any of the liberty owned vessels in the system.
This will show all information for each port call the vessel is currently scheduled to stop at.
A non-logged in user cannot edit any of this information, however they can export the information to excel or copy and paste the information directly from the page to more easily utilize the data.
*This page is the equivalate to the “MS Vessel Schedule” page in the VAT.
*The Export to Excel button will produce the “MS Vessel Schedule - Report” page in the VAT.
¶ Logged In Features
A logged in user will have the same read functionality as a logged-out user but will also be able to add port calls, change order of port call, edit information on any port call and delete port calls. The user will also be able to add a full rotation template or a specific voyage template to the end of the current schedule.
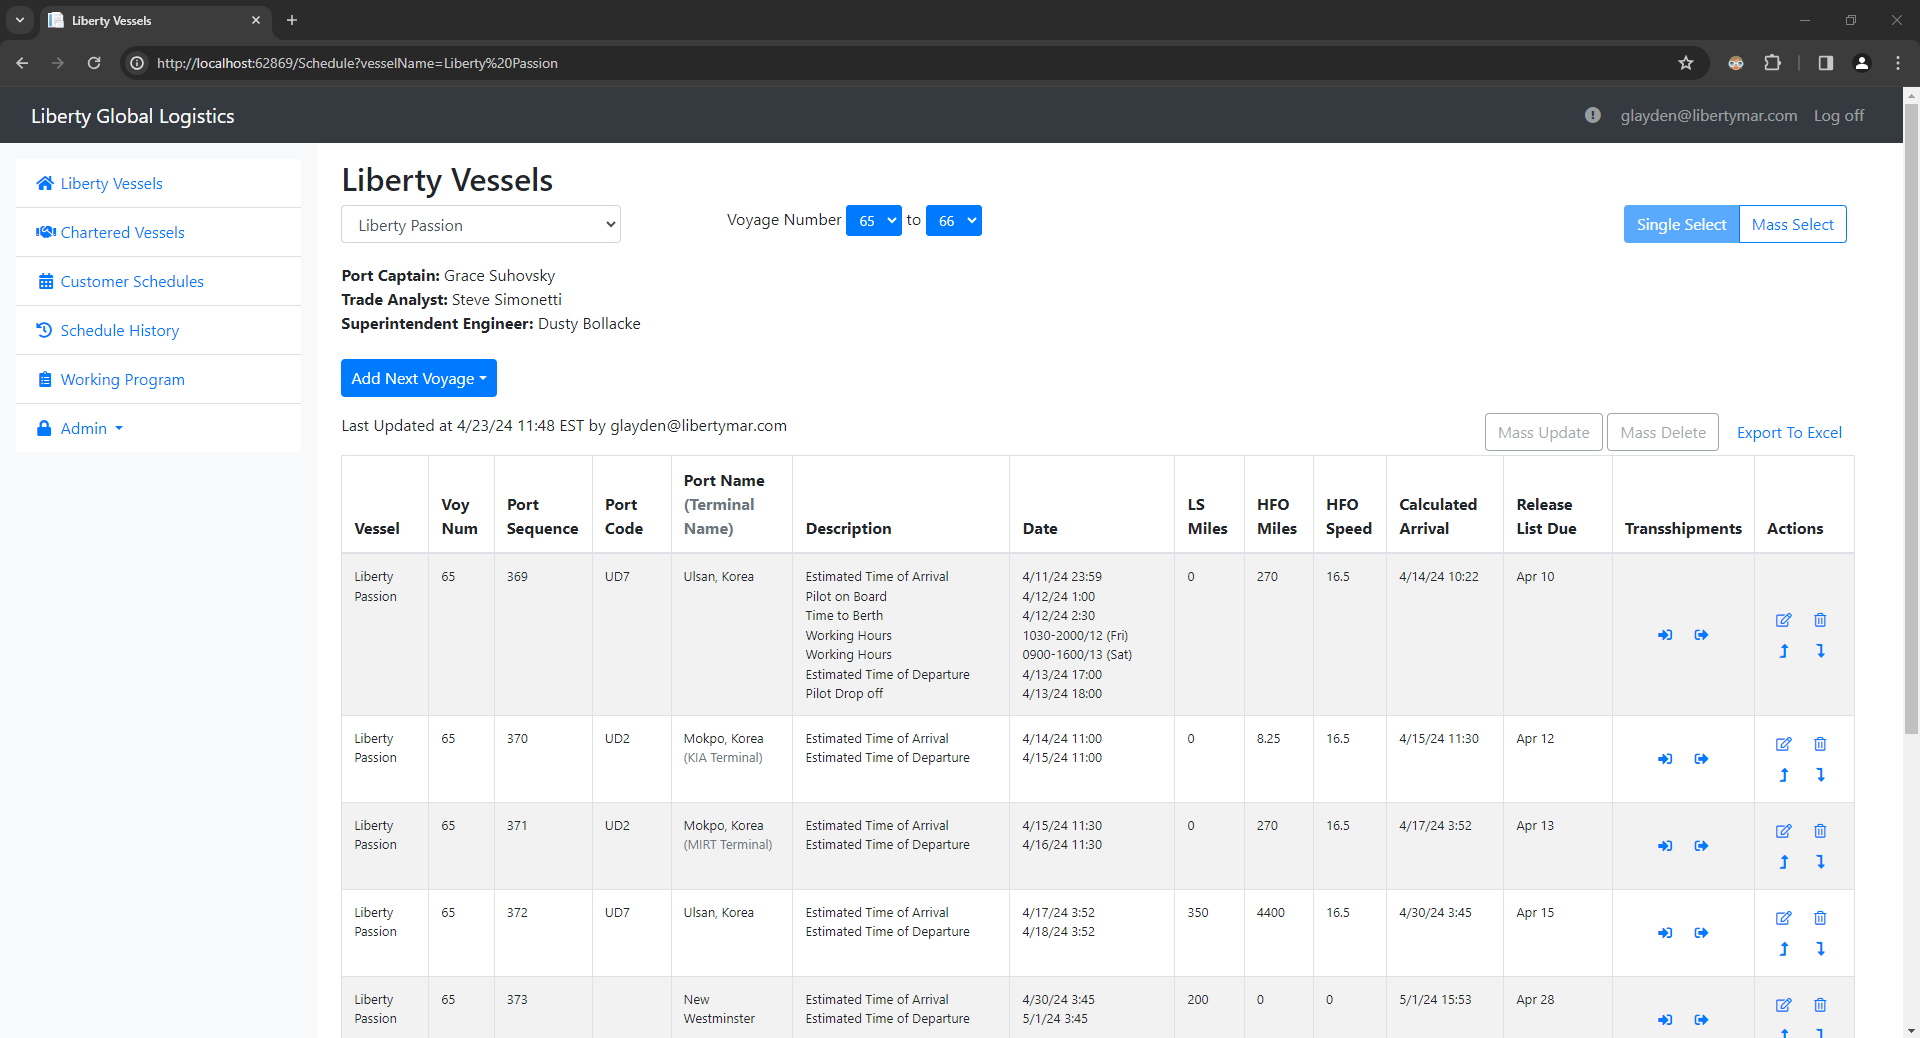
When the page first loads the current ongoing voyage and the voyage directly after that will be displayed. The user can use the two drop down arrows at the top of the screen to view other voyages from this vessel. The user can also use the drop down in the top left side to select a different vessel.
To add a full voyage to the end of this vessel’s schedule select the Add Next Voyage dropdown and then either select a rotation template or a specific voyage number from this vessel that you would like to copy and have added as the next voyage.
Each row in the data table relates to a single port call, this data table provides data on vessel, voyage number, port, port call details (ETA, time to berth, working hours, ETA etc.), miles to the next port and the calculated arrival to the next port.
In the last column there are icons to:
 |
edit this port call |
 |
delete this port call |
 |
add a new port call above this port call |
 |
add a new port call below this port call |
Clicking any of these icons will bring up a popup modal in which the user will enter the information needed to make these changes.
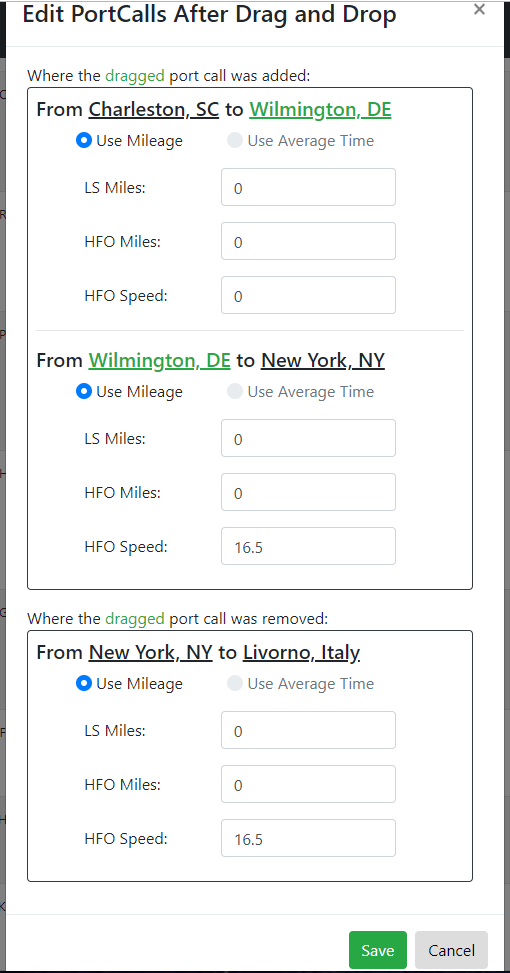
In addition to these icons the user may also change the order of port calls simply by dragging and dropping a port call to its new position. Note that you must drag from the vessel name column. This will trigger a popup modal to display asking for the new mileage for the new port order.
The Mileage section of the popups will be explained in a section below.
¶ Popup Modals
The below sections will go into more detail of each popup modal that will be displayed in the vessel schedule page.
- Edit Modal
- Port Items
- Delete Modal
- Create New Port Call Modal
- Drag & Drop Modal
- Mileage Section of Modals
¶ Edit Modal
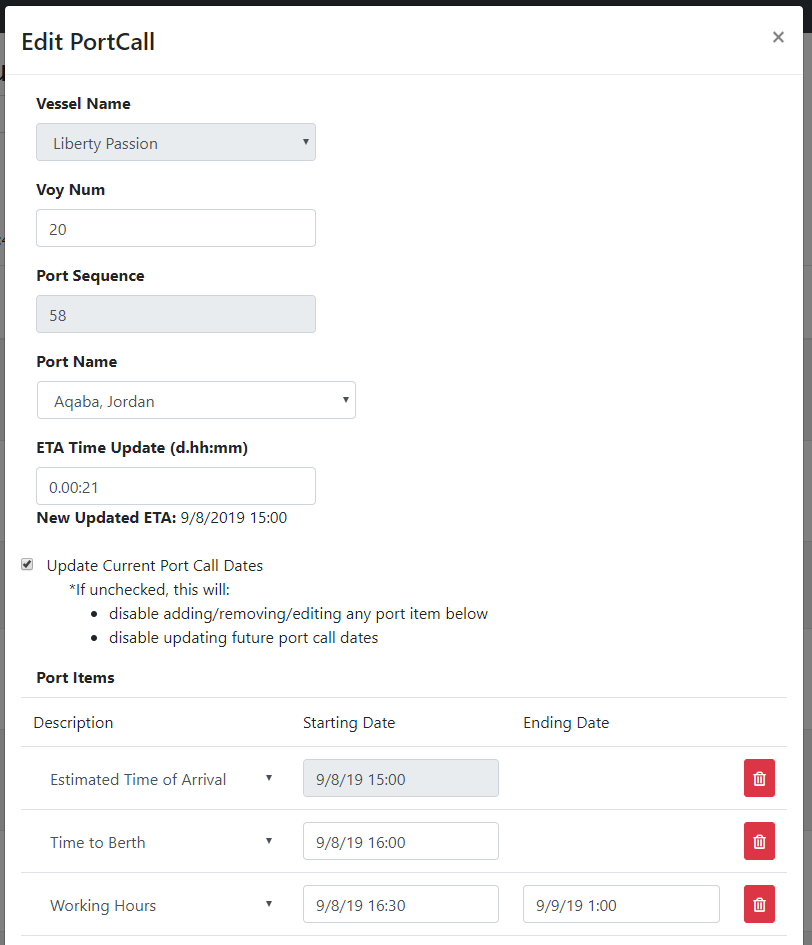
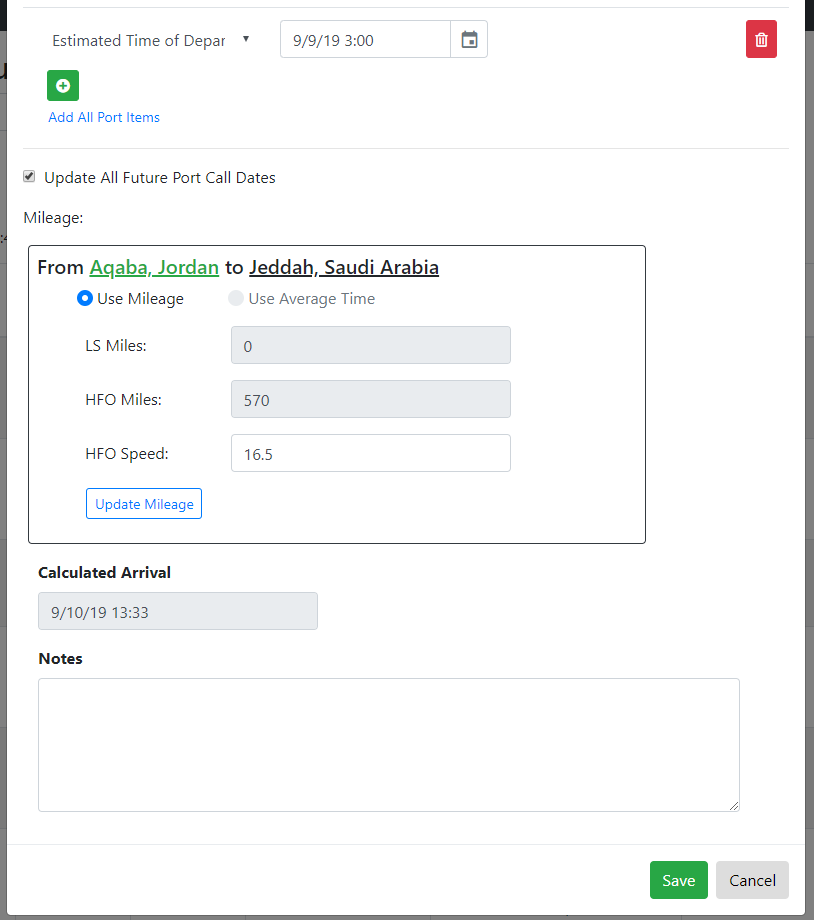
The edit modal will appear after clicking the edit button next to each port call. This is where information for this port call can be changed. The only information that can’t change for any port call is the Vessel Name and Port Sequence. The port sequence can be updated by dragging and dropping a port call only. The ETA and Calculated arrival can’t be edited directly but both will auto calculate after saving changing on this page. ETA Time Update is a field that allows the ETA of this port call to differ from the previous port call’s Calculated Arrival. After updating the ETA Time Update field, the time next to the New Updated ETA field will automatically calculate to show what the new ETA will be after saving. If the “Update Current Port Call Dates” check mark is checked then all port calls will increase by the time added to the ETA Time Update field. If this check mark is unchecked then only the ETA field will update and leave the remaining port items’ times the same. However, the new ETA time will need to be before the next port item time since you will not be able to update any port item’s time or update and calculated arrival for any port calls (this will not happen any way since the ending port item date for this port call will not be updated). Port Items will be discussed in the Port Items section below. By unchecking the “Update All Future Port Call Dates” the calculated arrival for this port call will be update however none of the remaining port calls ETA, port items, or calculated arrival’s will be updated. The Mileage section will be discussed below.
¶ Port Items
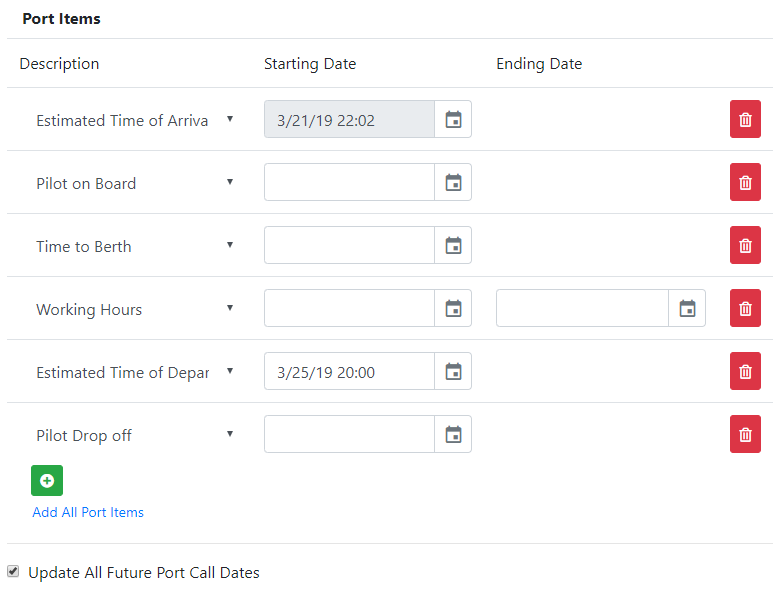
Click the Add all port items button to add and reorder all port items. Click the green plus button to add 1 port item at a time. Each Description drop down can be changed and the starting date and ending date can be changed. Click on the calendar icon to bring up a Date Time picker to make it easier to choose your dates.
¶ Delete Modal
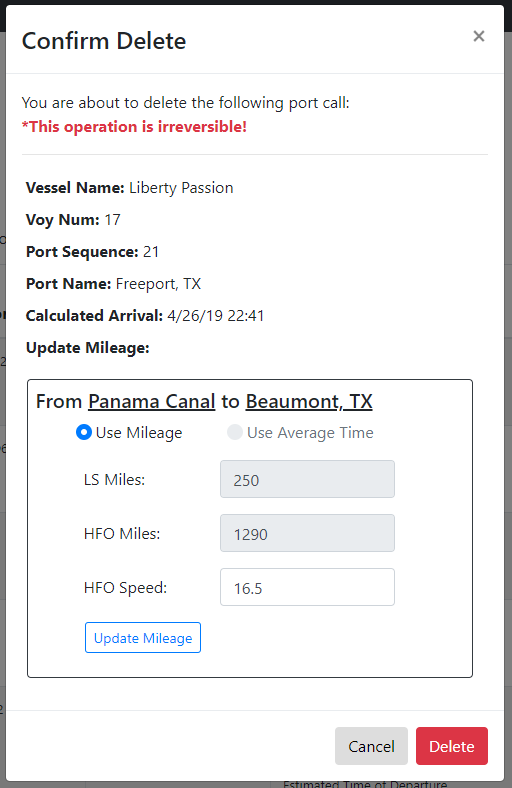
The delete modal will appear after clicking the delete button next to each port call. This will remove this port call from the schedule and will ask for the new mileage between the port call directly before the removed port call and directly after the removed port call. Once new mileage is added the user must confirm that the port call is to be removed. After clicking delete, the port call will be removed, the mileage will be updated for the previous port call and the ETAs and all other dates for each port item of every port call after the deleted port call will be updated to the new times calculated by the schedule.
¶ Add New Port Call Modal
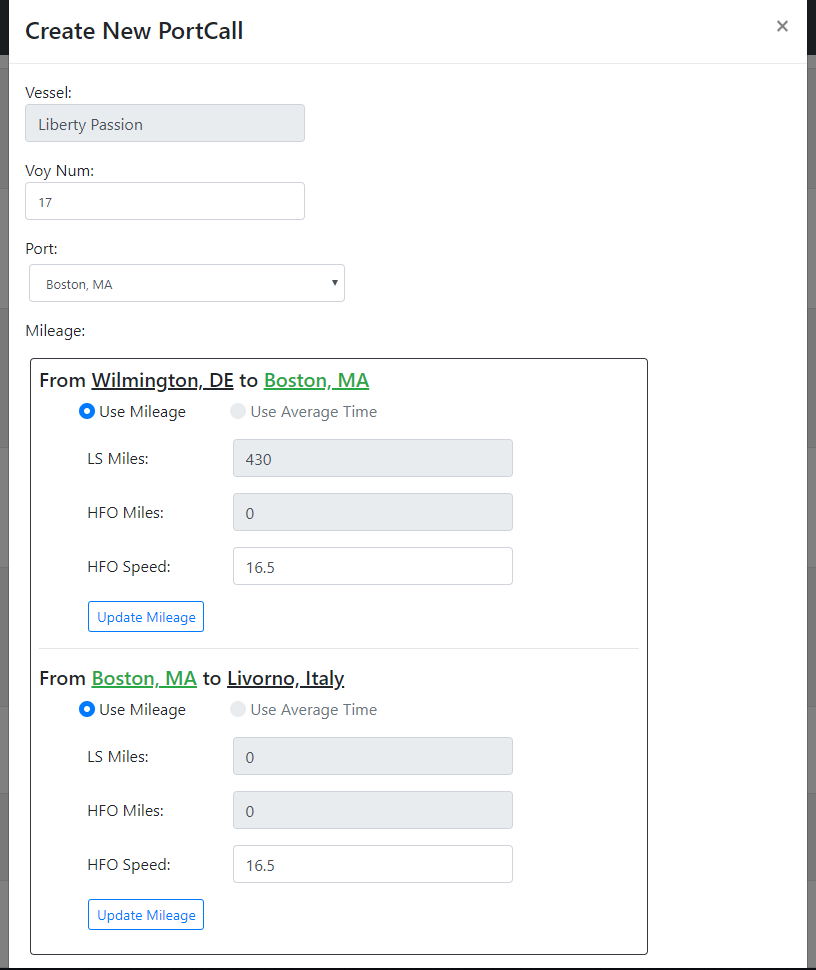
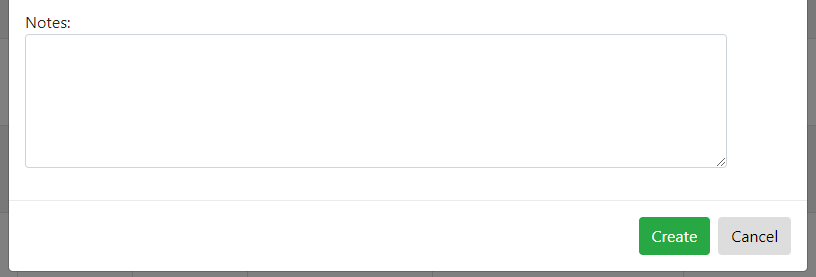
After clicking either the up or down arrow on a port call, the create new port call modal will display. The user must first enter in the new Port to be added in and then update and edit the mileage between the port calls that will be before and after the new port call. The user may also add in notes if needed.
¶ Drag & Drop Modal
¶ Mileage Section
The mileage section works the same for each modal that uses it. This section will only be displayed if the mileage is needed, for example if you add a port call after the very last port call on a vessel this section will only display the 1 mileage section from the last port call to the newly created port call and not the section from the newly create port call to the port call after because it doesn’t exist.
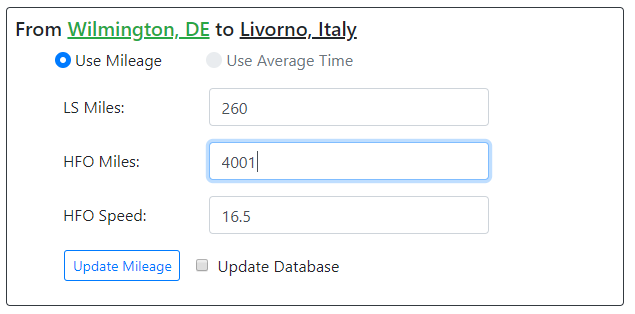
There are a few different formats that this section will have. First you will notice a radio button that will allow you to choose between using mileage or using average time, currently only the mileage is working. Following this will be a section to enter in the mileage from port to port as displayed at the top of this section. Below is a list of the different scenarios that might come about.
- No mileage for this port pair has ever been entered into the database. This will force the user to enter mileage and speed.
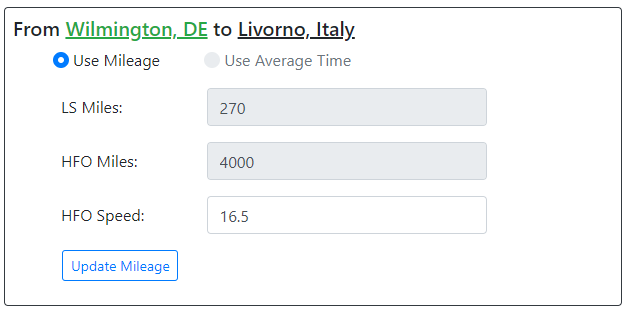
- Mileage for this port pair has been found in the database. This will not allow the user to update the mileage but will allow the user to change the speed. However, if the user needs to change this information for any reason the user can section the “Update Mileage” button that will be displayed below the mileage which will then allow the user to update the mileage, speed, and ask the user if these numbers should be changed in the database or not.
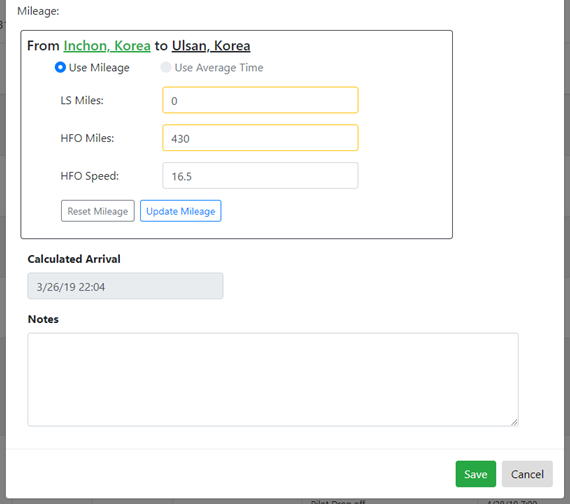
- If the mileage has been updated but does not reflect the same mileage that is found in the database a yellow box will appear around the mileage. The user will be allowed to change the mileage and the speed, update the database to the new mileage or to reset the mileage to the mileage that is found in the database.
¶ Transshipment Link Modal
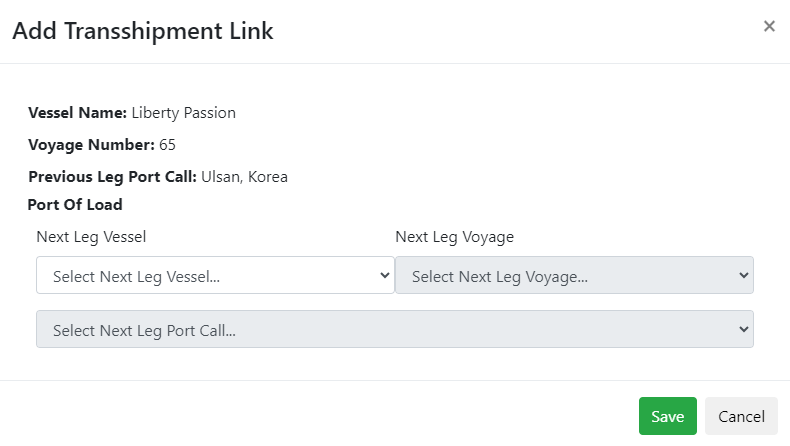
After clicking the ‘Transshipment From’ or ‘Transshipment To’ button in the ‘Transshipments’ column, a modal will appear displaying the current transshipments that exist (if any exist), and a green button that adds a new transshipment link when clicked.
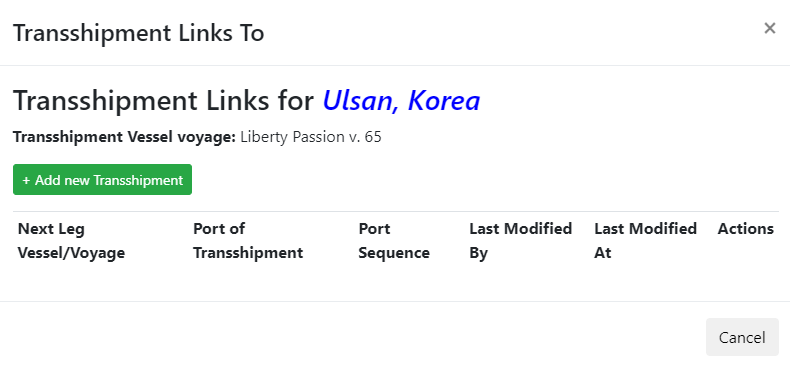
*Note: Above is the modal that appears after clicking the ‘Transshipment To’ button. The functionalities are the same for both buttons, but when clicking the ‘Transshipment From’ button, the column ‘Next Leg Vessel/Voyage’ will change to ‘Previous Leg Vessel/Voyage’
After clicking on the green ‘+ Add new Transshipment’ button, a new modal will appear for adding transshipment links. Here, you can input the vessel, voyage, and port call of the transshipment link that you want to add.